


Get started
Install Anchor, scaffold your first program, and explore the workspace loop.
Installation
Solana Playground
Local development
Installation
Learn how to install Rust, the Solana CLI, and Anchor Framework on Windows (WSL), Linux, or Mac.
This page covers how to set up a local environment for Solana development on the stable v1 (anchor-lang) path. For the v2 alpha, see v2 installation.
Quick installation#
A single script installs Rust, the Solana CLI, the Anchor CLI, Surfpool, Node.js, and Yarn in one go.
Run the installer in your terminal:
curl --proto '=https' --tlsv1.2 -sSfL https://solana-install.solana.workers.dev | bashWarning (WSL required)
Solana program development on Windows requires WSL. All commands below run inside the Ubuntu (Linux) terminal, not PowerShell.
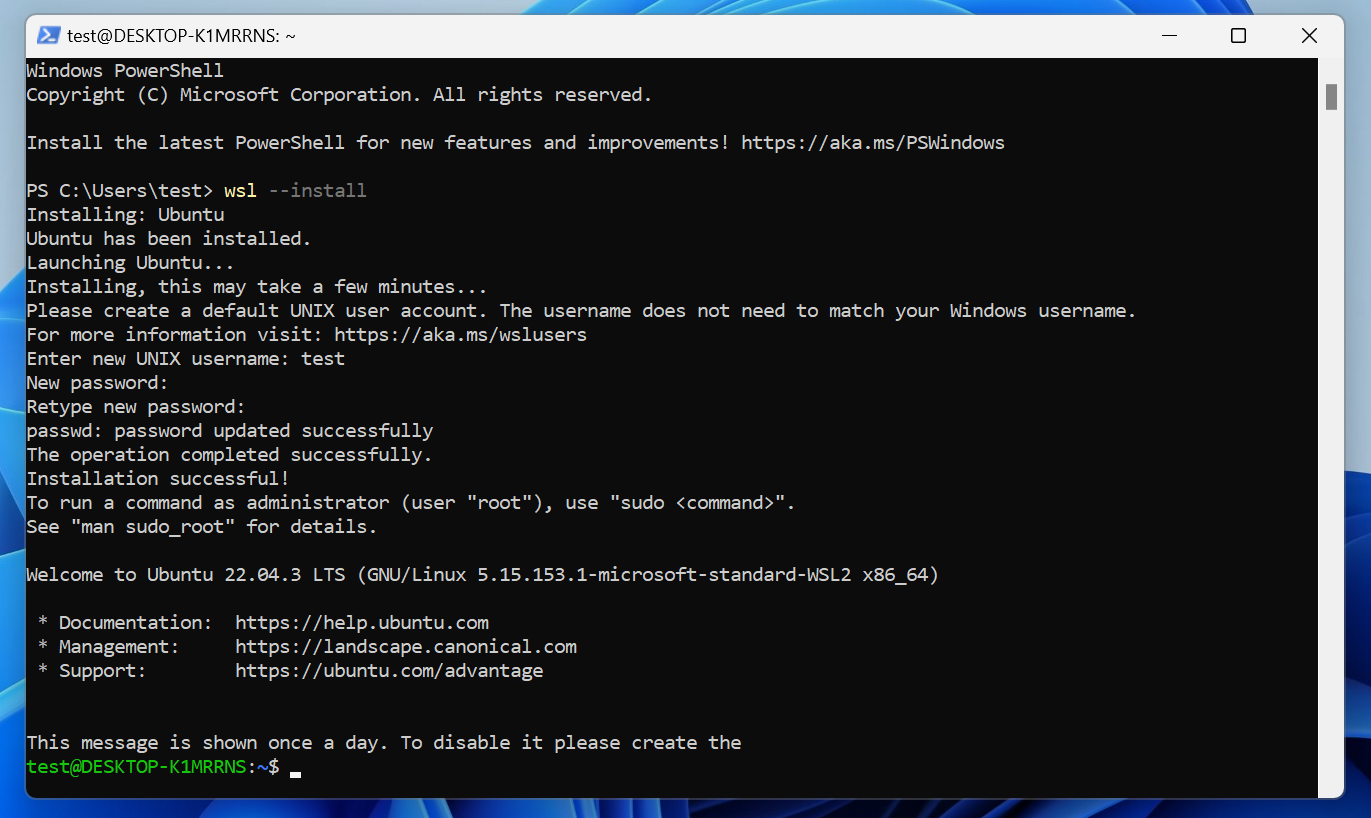
Install WSL from PowerShell with wsl --install, restart your machine, and create a default Ubuntu user when prompted. Then open the Ubuntu terminal and run:
curl --proto '=https' --tlsv1.2 -sSfL https://solana-install.solana.workers.dev | bashAfter installation, you should see output similar to the following:
Installed Versions:Rust: rustc 1.95.0 (59807616e 2026-04-14)Solana CLI: solana-cli 3.1.14 (src:ca2c682f; feat:534737035, client:Agave)Anchor CLI: anchor-cli 0.32.1Surfpool CLI: surfpool 1.2.0Node.js: v24.12.0Yarn: 1.22.22
Installation complete. Please restart your terminal to apply all changes.
Note
If the quick install succeeds, skip ahead to Solana CLI basics and Anchor CLI basics. If it fails, follow the per-tool instructions below.
Manual installation#
The walkthroughs below install each dependency individually.
Solana programs are written in Rust. The recommended installer is rustup:
curl --proto '=https' --tlsv1.2 -sSf https://sh.rustup.rs | sh -s -- -yA successful install prints:
Rust is installed now. Great!
To get started you may need to restart your current shell.This would reload your PATH environment variable to includeCargo's bin directory ($HOME/.cargo/bin).
Reload your PATH to pick up the ~/.cargo/bin/ directory:
. "$HOME/.cargo/env"Verify the install with rustc --version:
rustc --versionrustc 1.95.0 (59807616e 2026-04-14)The Solana CLI ships the tools required to build and deploy Solana programs. Install with the official script:
sh -c "$(curl -sSfL https://release.anza.xyz/stable/install)"Tip (Pinning a version)
Replace stable with a release tag (e.g. v2.0.3) or one of beta / edge. All available releases are listed on the Agave GitHub repo.
On macOS with zsh, append the PATH export to ~/.zshrc so it persists between shell sessions:
echo 'export PATH="$HOME/.local/share/solana/install/active_release/bin:$PATH"' >> ~/.zshrcReload the shell with source ~/.zshrc, then verify with solana --version:
solana --versionsolana-cli 3.1.14 (src:ca2c682f; feat:534737035, client:Agave)Note
Agave is the validator client from Anza, formerly known as the Solana Labs validator client.
To update the Solana CLI later, run agave-install update.
Anchor is a framework for developing Solana programs that uses Rust macros to reduce boilerplate. The recommended install path is the Anchor Version Manager (AVM), which tracks multiple Anchor versions and simplifies upgrades.
Install AVM:
cargo install --git https://github.com/otter-sec/anchor avm --locked --forceVerify AVM with avm --version:
avm --versionavm 1.0.1Install and activate the latest Anchor CLI:
avm install latestavm use latestTip (Pinning a version)
To install a specific version, pass the version number:
avm install 1.0.1avm use 1.0.1Note
avm use is required after every avm install to activate the
version on your system.
Install a specific Anchor CLI version directly from the repository:
cargo install --git https://github.com/otter-sec/anchor --tag v1.0.1 anchor-cli --lockedVerify with anchor --version:
anchor --versionanchor-cli 1.0.1Node.js and Yarn are required for anchor init and the TypeScript-based test templates (mocha, jest). The default litesvm template runs entirely in Rust, so Node and Yarn are not needed for day-to-day work once a project is initialized.
Install Node Version Manager (nvm):
curl -o- https://raw.githubusercontent.com/nvm-sh/nvm/master/install.sh | bashRestart your terminal, then verify nvm is on your PATH with command -v nvm. Install Node and verify with node --version:
nvm install nodenode --versionv23.7.0Install Yarn globally via npm:
npm install --global yarnVerify with yarn --version:
yarn --version1.22.1The Anchor CLI build requires several apt packages. Refresh apt’s package index and install:
sudo apt-get updatesudo apt-get install -y build-essential pkg-config libudev-dev llvm libclang-dev protobuf-compiler libssl-devProblem (Package protobuf-compiler is not available)
If apt reports Package protobuf-compiler is not available, but is referred to by another package, run sudo apt-get update first and retry.
Solana programs are written in Rust. The recommended installer is rustup:
curl --proto '=https' --tlsv1.2 -sSf https://sh.rustup.rs | sh -s -- -yReload your PATH to pick up the ~/.cargo/bin/ directory:
. "$HOME/.cargo/env"Verify with rustc --version:
rustc --versionrustc 1.95.0 (59807616e 2026-04-14)Install the Solana CLI with the official script:
sh -c "$(curl -sSfL https://release.anza.xyz/stable/install)"Tip (Pinning a version)
Replace stable with a release tag (e.g. v2.0.3) or one of beta / edge. All available releases are listed on the Agave GitHub repo.
The installer prints the PATH export you need:
Close and reopen your terminal to apply the PATH changes or run the following in your existing shell:
export PATH="/home/test/.local/share/solana/install/active_release/bin:$PATH"
Either restart your terminal or apply the export in the current shell:
export PATH="$HOME/.local/share/solana/install/active_release/bin:$PATH"Verify with solana --version:
solana --versionsolana-cli 3.1.14 (src:ca2c682f; feat:534737035, client:Agave)To update the Solana CLI later, run agave-install update.
Anchor is a framework for developing Solana programs that uses Rust macros to reduce boilerplate. The recommended install path is the Anchor Version Manager (AVM).
Install AVM, then install and activate the latest Anchor CLI:
cargo install --git https://github.com/otter-sec/anchor avm --locked --forceavm install latestavm use latestTip (Pinning a version)
To install a specific version, pass the version number:
avm install 1.0.1avm use 1.0.1Note
avm use is required after every avm install to activate the
version on your system.
Install a specific Anchor CLI version directly from the repository:
cargo install --git https://github.com/otter-sec/anchor --tag v1.0.1 anchor-cli --lockedVerify with anchor --version:
anchor --versionanchor-cli 1.0.1Problem ("could not exec the linker cc")
If the install fails with error: could not exec the linker cc = note: Permission denied (os error 13), the build prerequisites above are missing. Install them and retry the Anchor CLI install.
Node.js and Yarn are required for anchor init and the TypeScript-based test templates (mocha, jest). The default litesvm template runs entirely in Rust, so Node and Yarn are not needed for day-to-day work once a project is initialized.
Install Node Version Manager (nvm):
curl -o- https://raw.githubusercontent.com/nvm-sh/nvm/master/install.sh | bashRestart your terminal, then verify nvm is on your PATH with command -v nvm. Install Node and verify with node --version:
nvm install nodenode --versionv23.7.0Install Yarn globally via npm:
npm install --global yarnVerify with yarn --version:
yarn --version1.22.1Warning (WSL required)
Solana program development on Windows requires WSL. All commands below run inside the Ubuntu (Linux) terminal, not PowerShell.
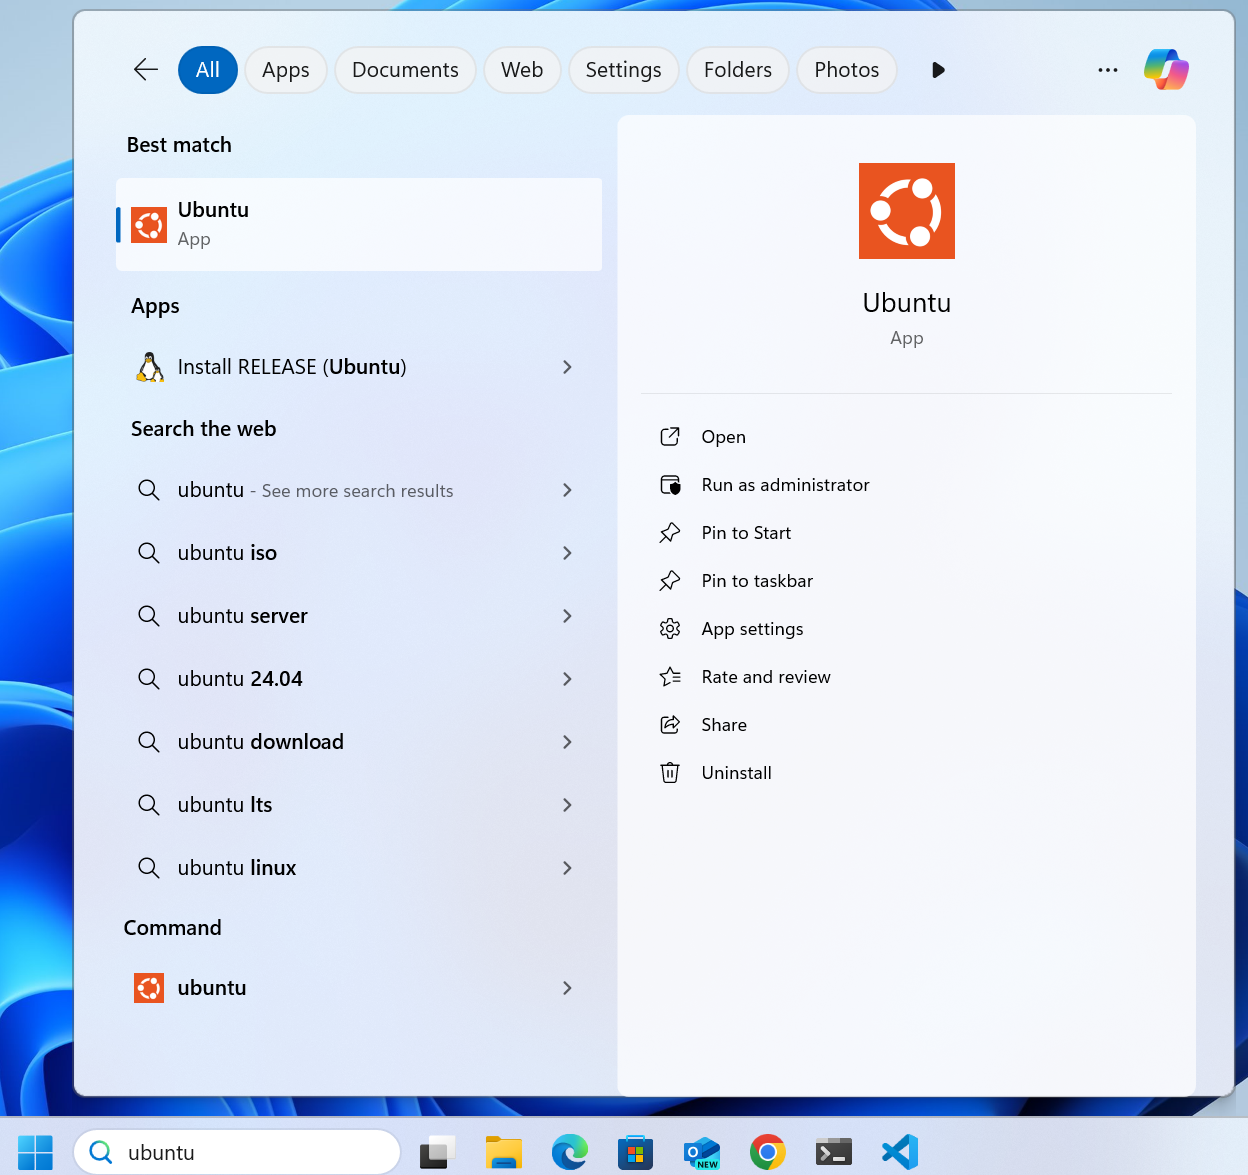
Install WSL from Windows PowerShell with wsl --install. The installer prompts you to create a default user account.
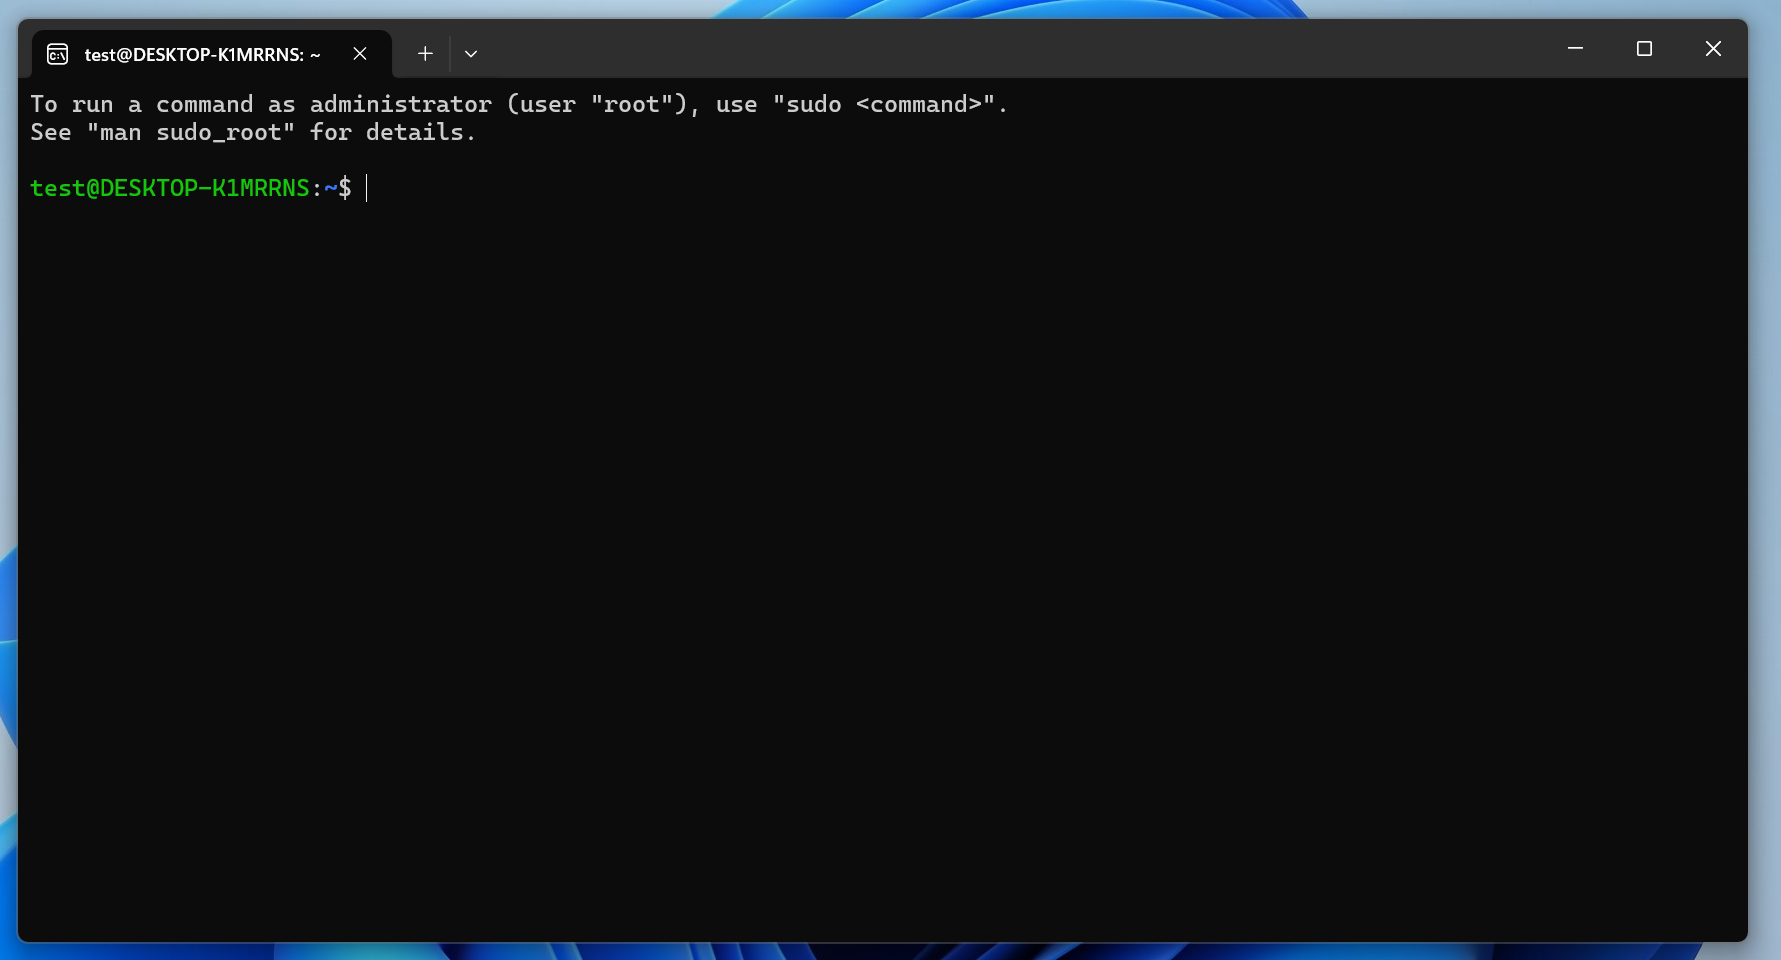
By default, WSL installs Ubuntu. Open a Linux terminal by searching “Ubuntu” in the Search bar.
Tip (Paste not working?)
If Ctrl+V doesn’t paste in your Ubuntu terminal, open Windows Terminal (search “Terminal” in the Search bar), close it, then reopen the Ubuntu terminal. Paste should now work.
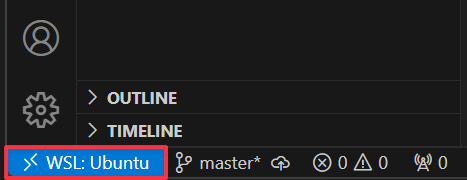
For VS Code users, the WSL extension enables editing WSL projects directly from VS Code. Once active, the status bar shows the connected distribution.
Inside your Ubuntu terminal, refresh apt and install the packages required by the Anchor CLI build:
sudo apt-get updatesudo apt-get install -y build-essential pkg-config libudev-dev llvm libclang-dev protobuf-compiler libssl-devProblem (Package protobuf-compiler is not available)
If apt reports Package protobuf-compiler is not available, but is referred to by another package, run sudo apt-get update first and retry.
Install the Solana CLI with the official script:
sh -c "$(curl -sSfL https://release.anza.xyz/stable/install)"Apply the PATH export the installer prints:
export PATH="$HOME/.local/share/solana/install/active_release/bin:$PATH"Verify with solana --version:
solana --versionsolana-cli 3.1.14 (src:ca2c682f; feat:534737035, client:Agave)To update the Solana CLI later, run agave-install update.
Install the Anchor Version Manager (AVM), then install and activate the latest Anchor CLI:
cargo install --git https://github.com/otter-sec/anchor avm --locked --forceavm install latestavm use latestVerify with anchor --version:
anchor --versionanchor-cli 1.0.1Problem ("could not exec the linker cc")
If the install fails with error: could not exec the linker cc = note: Permission denied (os error 13), the build prerequisites above are missing. Install them and retry.
Node.js and Yarn are required for anchor init and the TypeScript-based test templates (mocha, jest).
Install nvm and then Node:
curl -o- https://raw.githubusercontent.com/nvm-sh/nvm/master/install.sh | bashnvm install nodenode --versionv23.7.0Install Yarn globally via npm:
npm install --global yarnyarn --version1.22.1Warning (Common build errors)
These errors can surface on any OS when running anchor build or anchor test.
Problem ("error: not a directory")
error: not a directory: '.../solana-release/bin/sdk/sbf/dependencies/platform-tools/rust/lib'Try these solutions in order:
-
Force install platform tools:
Terminal window cargo build-sbf --force-tools-install -
If that doesn’t work, clear the Solana cache:
Terminal window rm -rf ~/.cache/solana/*
Problem (lock file version 4 requires -Znext-lockfile-bump)
Change the version field of Cargo.lock from 4 to 3:
version = 4version = 3Then retry anchor build. See anchor#3392 for background.
Problem ("Permission denied" or "No such file or directory")
On Linux or WSL, anchor test may fail with Permission denied (os error 13) or No such file or directory (os error 2) when Node.js or Yarn are not installed. Install both using the steps above and retry.
Solana CLI basics#
The following steps cover the most common Solana CLI commands. These work identically on every operating system.
Solana config#
Inspect the current config with solana config get:
solana config getConfig File: /Users/test/.config/solana/cli/config.ymlRPC URL: https://api.mainnet-beta.solana.com WebSocket URL: wss://api.mainnet-beta.solana.com/ (computed)Keypair Path: /Users/test/.config/solana/id.json Commitment: confirmed RPC URL and WebSocket URL identify the cluster the CLI targets. The default is mainnet-beta. To switch clusters, use either the long (--url) or short (-u<letter>) form:
Keypair Path points at the default wallet used to sign transactions and pay fees, located at ~/.config/solana/id.json. The next step generates a keypair at that location.
Create wallet#
The Solana CLI requires a keypair wallet funded with SOL to interact with the network. Generate one at the default keypair path:
solana-keygen newGenerating a new keypair
For added security, enter a BIP39 passphrase
NOTE! This passphrase improves security of the recovery seed phrase NOT thekeypair file itself, which is stored as insecure plain text
BIP39 Passphrase (empty for none):
Wrote new keypair to /Users/test/.config/solana/id.json===========================================================================pubkey: 8dBTPrjnkXyuQK3KDt9wrZBfizEZijmmUQXVHpFbVwGT===========================================================================Save this seed phrase and your BIP39 passphrase to recover your new keypair:cream bleak tortoise ocean nasty game gift forget fancy salon mimic amazing===========================================================================Note
If a wallet already exists at the default path, solana-keygen new will not
overwrite it unless you pass --force.
Print the public key of the wallet with solana address:
solana address8dBTPrjnkXyuQK3KDt9wrZBfizEZijmmUQXVHpFbVwGTAirdrop SOL#
Your wallet needs SOL to pay transaction fees and deployment costs. Point the CLI at devnet:
solana config set -udConfig File: /Users/test/.config/solana/cli/config.ymlRPC URL: https://api.devnet.solana.com WebSocket URL: wss://api.devnet.solana.com/ (computed)Keypair Path: /Users/test/.config/solana/id.json Commitment: confirmed Then request an airdrop with solana airdrop 2.
Important (Rate limits)
The public faucet rate-limits airdrops per IP. If you see this error, use the Solana Web Faucet instead.
solana airdrop 2Requesting airdrop of 2 SOLError: airdrop request failed. This can happen when the rate limit is reached.Check the wallet balance with solana balance:
solana balance2 SOLRun local validator#
The Solana CLI ships with a built-in test validator for local development.
Tip (localhost cluster)
Point the CLI at the local validator before sending commands with solana config set -ul.
In a separate terminal, start the validator with solana-test-validator.
Anchor CLI basics#
The following steps cover the most common Anchor CLI commands. For full reference documentation, see the Anchor docs.
Initialize project#
Create a new Anchor project with anchor init <project-name>.
This creates a directory named <project-name> and scaffolds a modular Rust program. Tests default to the LiteSVM crate. To choose a different test template (mollusk, mocha, jest, etc.), pass --test-template:
anchor init <project-name> --test-template molluskNote
The default modular layout separates instructions, state, constants, and errors into distinct files. This structure is recommended for any codebase you plan to maintain. See the project file structure for details.
Navigate into the new directory with cd <project-name>.
Build program#
Compile the program with anchor build. The compiled artifact is written to target/deploy/.
Deploy program#
Deploy the program to the cluster specified in Anchor.toml with anchor deploy.
Test program#
Run the project’s test suite with anchor test.
Note
anchor test builds, deploys, and runs the tests. When cluster = "Localnet" in Anchor.toml, it also starts a local validator, runs the tests against it, and shuts it down afterward.
Shell completions#
anchor and avm can generate completions for bash, fish, and zsh.
mkdir -p $HOME/.local/share/bash-completion/completionsanchor completions bash > $HOME/.local/share/bash-completion/completions/anchoravm completions bash > $HOME/.local/share/bash-completion/completions/avmexec bashmkdir -p $HOME/.config/fish/completionsanchor completions fish > $HOME/.config/fish/completions/anchor.fishavm completions fish > $HOME/.config/fish/completions/avm.fishsource $HOME/.config/fish/config.fishFirst ensure the following is in your ~/.zshrc (skip this if using oh-my-zsh):
autoload -U compinitcompinit -iThen generate the completions:
anchor completions zsh | sudo tee /usr/local/share/zsh/site-functions/_anchoravm completions zsh | sudo tee /usr/local/share/zsh/site-functions/_avmexec zshSolana Playground
Learn how to build your first Solana program using the Anchor framework directly in your browser.
In this section, we’ll build, deploy, and test a simple Solana program using the Anchor framework. By the end, you’ll have deployed your first program to the Solana blockchain!
Solana Playground (Solpg) is a browser-based development environment that lets you develop, deploy, and test Solana programs without installing anything locally.
Getting started#
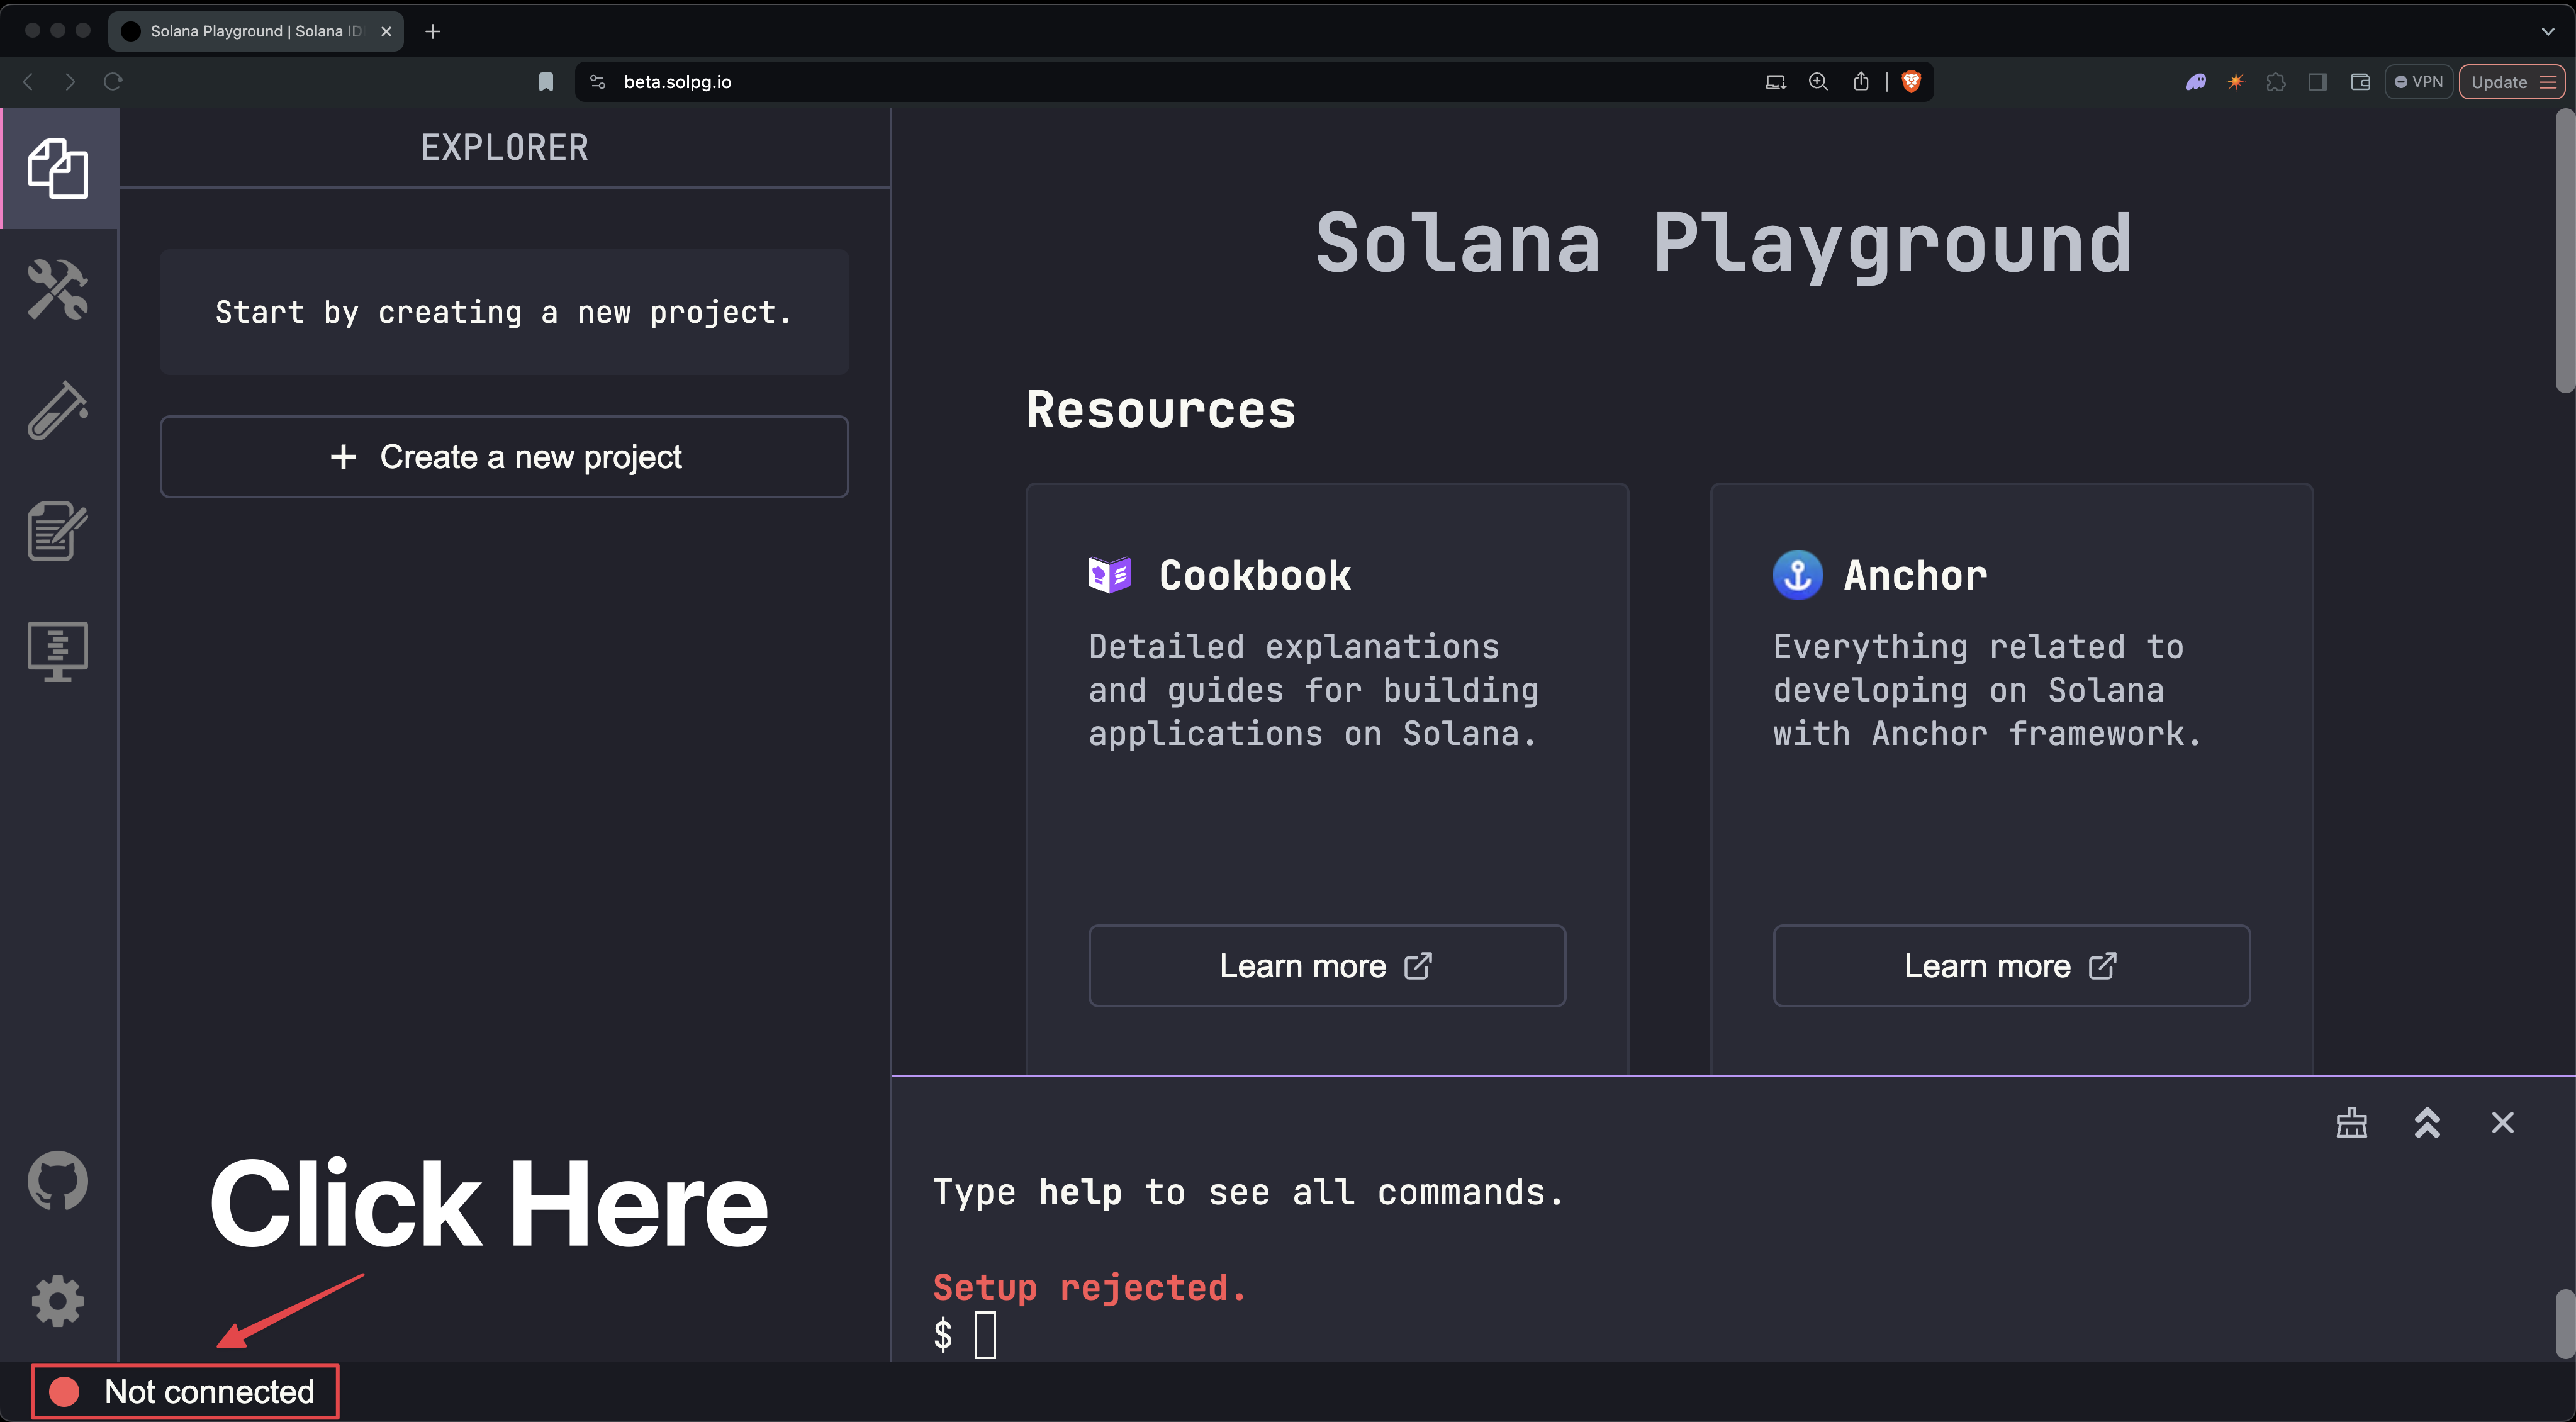
Open a new tab in your web browser and navigate to https://beta.solpg.io/.
Create Playground wallet#
If you’re new to Solana Playground, the first step is to create your Playground wallet. This wallet lets you interact with the Solana network right from your browser.
Click the “Not connected” button at the bottom left of the screen.
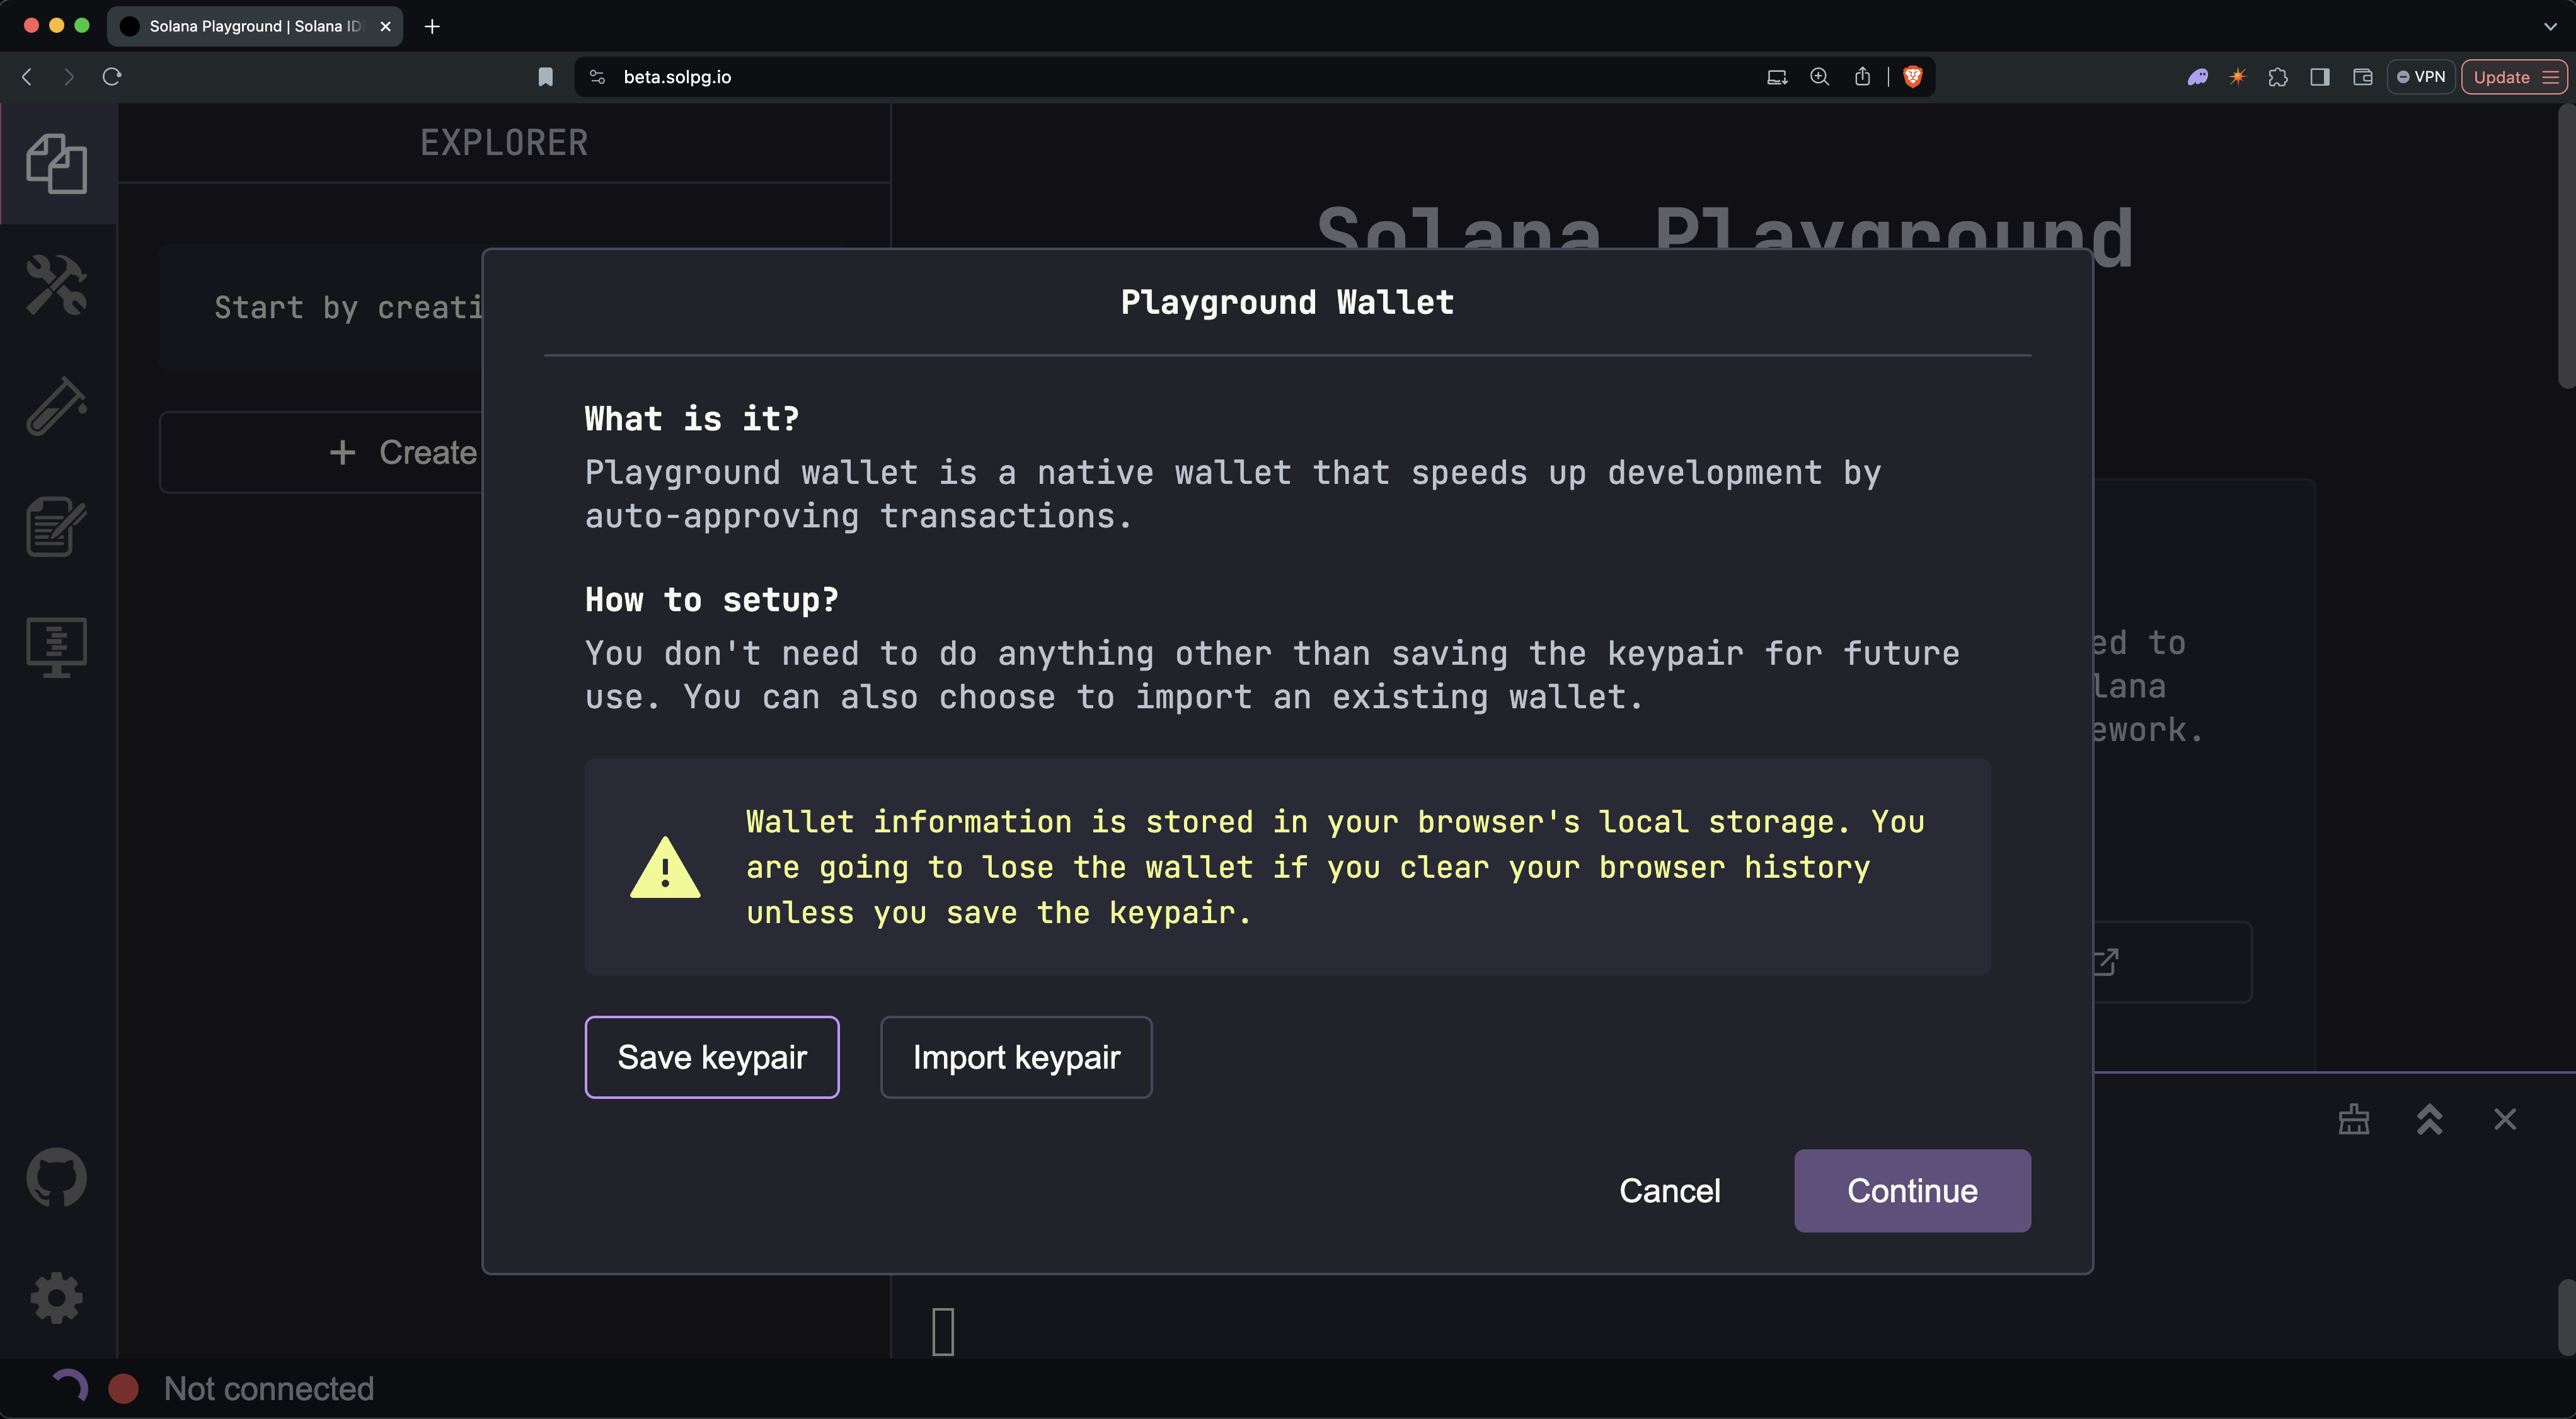
You’ll see an option to save your wallet’s keypair. Optionally save it for backup, then click “Continue”.
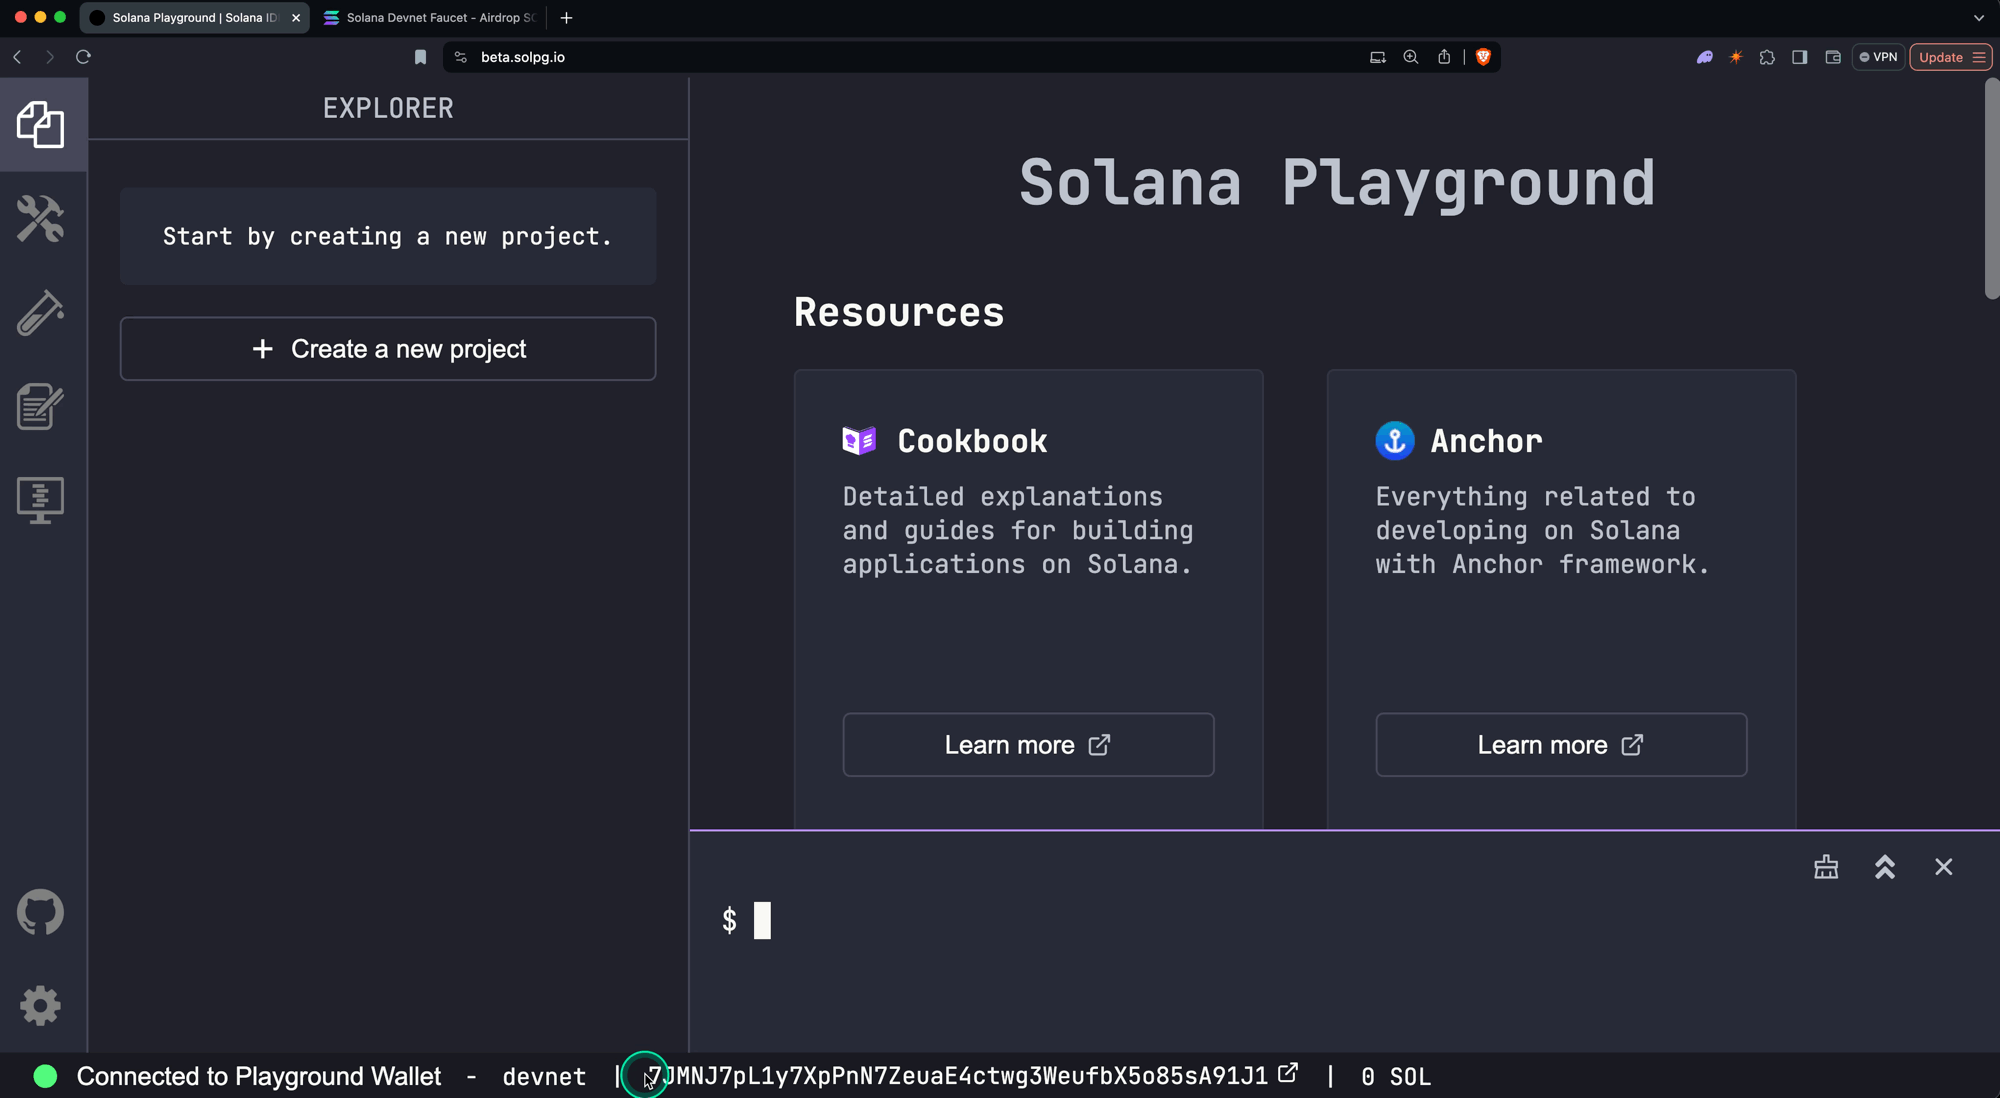
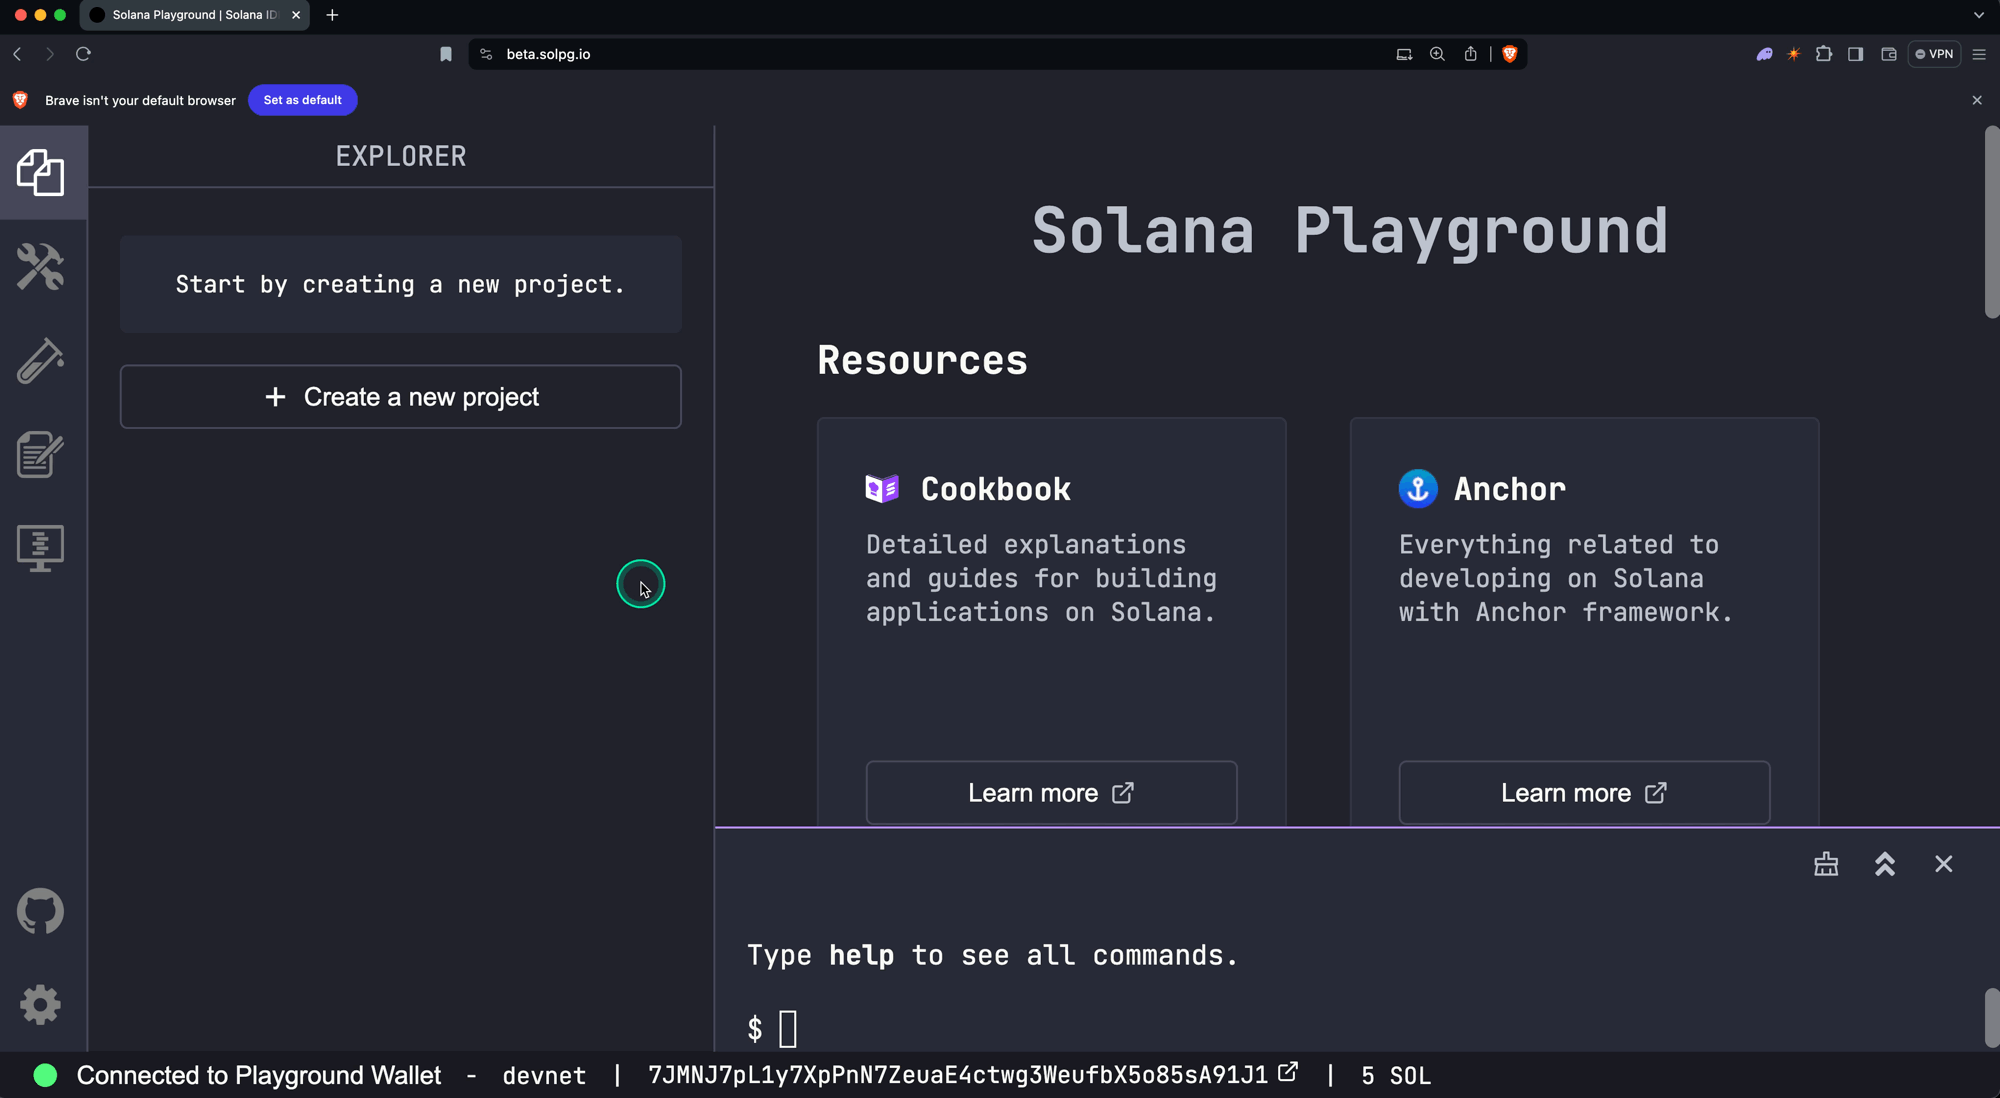
You should now see your wallet’s address, SOL balance, and connected cluster (Devnet by default) at the bottom of the window.

Note
Your Playground wallet is saved in your browser’s local storage. Clearing your browser cache will remove it.
Some useful terms:
Definition (Wallet address)
A public key that serves as your unique identity on the Solana blockchain. Just like an email address is used to receive emails, your wallet address is used to receive SOL.
Definition (Connection cluster)
A network of Solana nodes (computers running the Solana validator client). Devnet is the cluster used for developer testing.
Get Devnet SOL#
Before we start building, we need some devnet SOL. SOL is required to create accounts on the network and to pay transaction fees.
In the Playground terminal, run solana airdrop 5. If the airdrop command doesn’t work (due to rate limits), use the Web Faucet. Enter your wallet address (found at the bottom of the Playground screen), select an amount, and click “Confirm Airdrop”.
Create Anchor project#
Open https://beta.solpg.io in a new browser tab. Click “Create a new project”, enter a project name, select Anchor as the framework, then click “Create”.
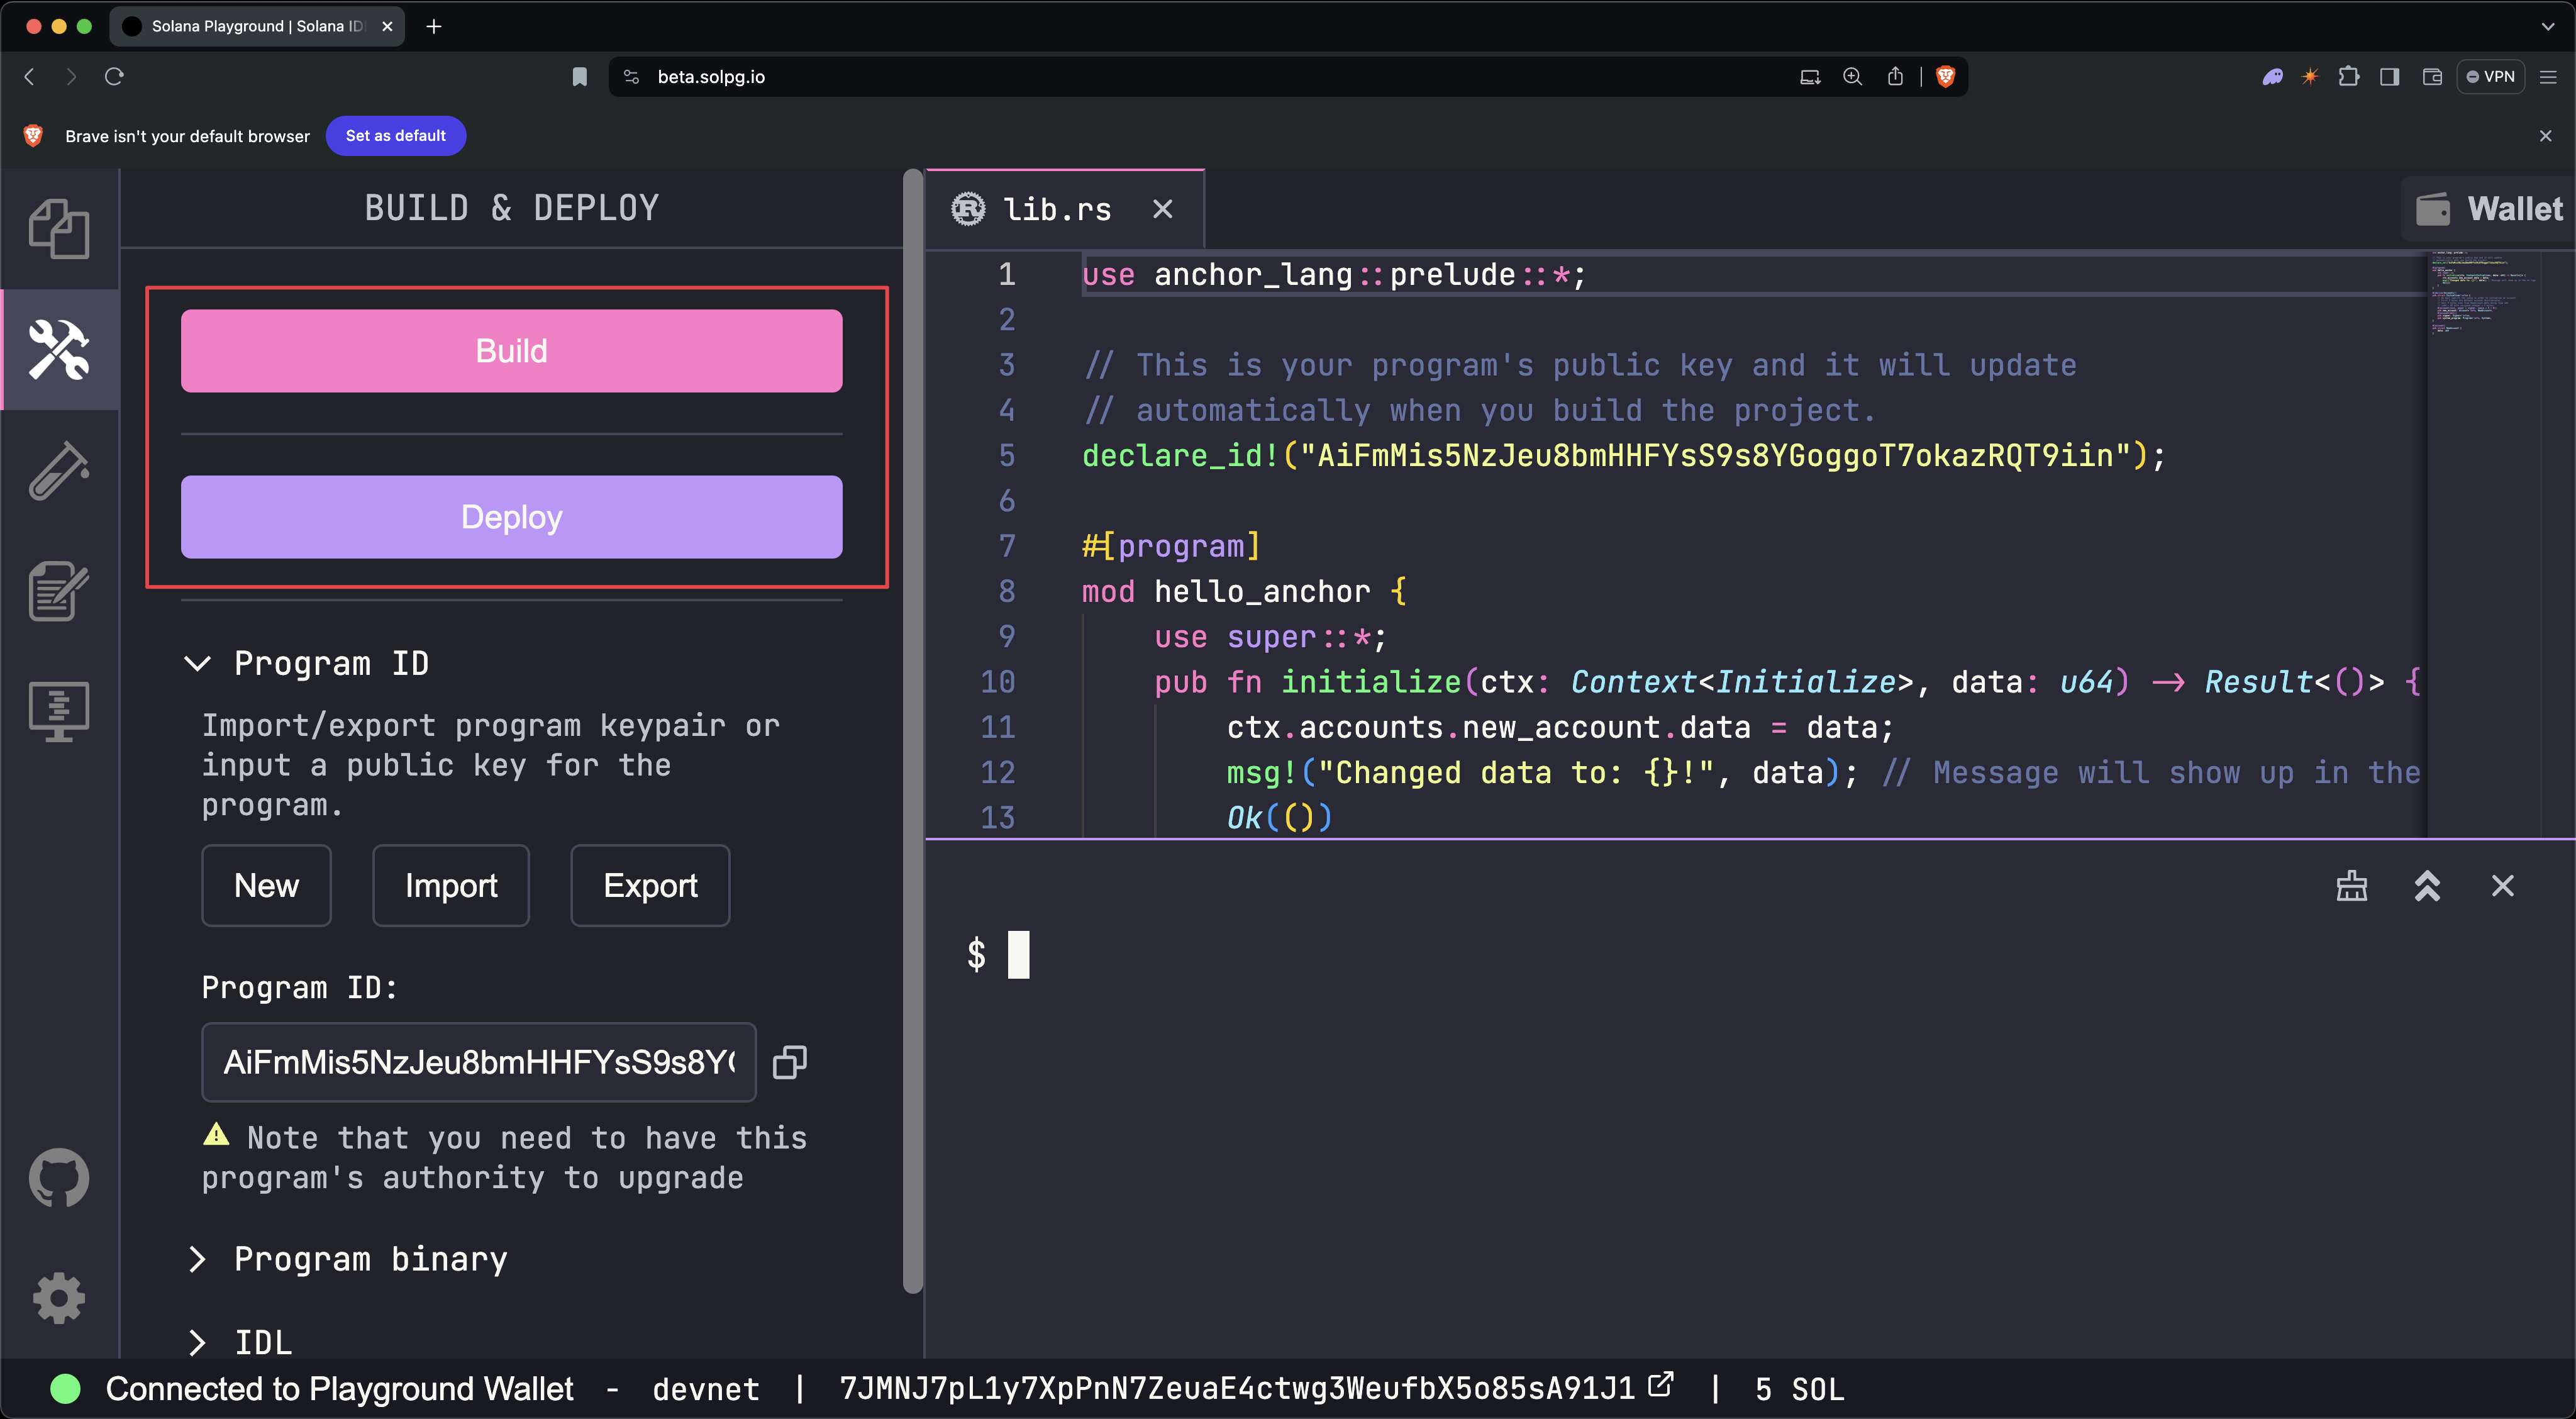
You’ll see a new project with the program code in src/lib.rs:
use anchor_lang::prelude::*;
// This is your program's public key and it will update// automatically when you build the project.declare_id!("11111111111111111111111111111111");
#[program]mod hello_anchor { use super::*; pub fn initialize(ctx: Context<Initialize>, data: u64) -> Result<()> { ctx.accounts.new_account.data = data; msg!("Changed data to: {}!", data); // Message will show up in the tx logs Ok(()) }}
#[derive(Accounts)]pub struct Initialize<'info> { // We must specify the space in order to initialize an account. // First 8 bytes are default account discriminator, // next 8 bytes come from NewAccount.data being type u64. // (u64 = 64 bits unsigned integer = 8 bytes) #[account(init, payer = signer, space = 8 + 8)] pub new_account: Account<'info, NewAccount>, #[account(mut)] pub signer: Signer<'info>, pub system_program: Program<'info, System>,}
#[account]pub struct NewAccount { data: u64}Explanation (Code explanation)
-
declare_id!()specifies the on-chain address of your program. It will be automatically updated when you build.declare_id!("11111111111111111111111111111111"); -
#[program]annotates a module containing the program’s instruction handlers.#[program]mod hello_anchor {use super::*;pub fn initialize(ctx: Context<Initialize>, data: u64) -> Result<()> {ctx.accounts.new_account.data = data;msg!("Changed data to: {}!", data);Ok(())}}The
initialize()instruction takes aContext<Initialize>(the required accounts) and adata: u64parameter. It stores the value and logs it. -
#[derive(Accounts)]annotates a struct that declares the accounts required by an instruction. Field types and constraints let Anchor auto-generate security checks.#[derive(Accounts)]pub struct Initialize<'info> {#[account(init, payer = signer, space = 8 + 8)]pub new_account: Account<'info, NewAccount>,#[account(mut)]pub signer: Signer<'info>,pub system_program: Program<'info, System>,} -
#[account]annotates a struct that defines the data layout of an account owned by this program.#[account]pub struct NewAccount {data: u64}
Build and deploy program#
To build the program, run build in the terminal:
buildBuilding...Build successful. Completed in 1.46s.Notice that the address in declare_id!() has been updated. This is your program’s on-chain address.
Once built, run deploy to deploy to the network (devnet by default). Make sure you have enough SOL first:
deployDeploying... This could take a while depending on the program size and network conditions.Warning: 8 transactions not confirmed, retrying...Deployment successful. Completed in 18s.You can also use the Build and Deploy buttons on the left-side panel.
Test program#
The starter code includes a test file at tests/anchor.test.ts that shows how to invoke the initialize() instruction from the client:
// No imports needed: web3, anchor, pg and more are globally available
describe('Test', () => { it('initialize', async () => { // Generate keypair for the new account const newAccountKp = new web3.Keypair()
// Send transaction const data = new BN(42) const txHash = await pg.program.methods .initialize(data) .accounts({ newAccount: newAccountKp.publicKey, signer: pg.wallet.publicKey, systemProgram: web3.SystemProgram.programId, }) .signers([newAccountKp]) .rpc() console.log(`Use 'solana confirm -v ${txHash}' to see the logs`)
// Confirm transaction await pg.connection.confirmTransaction(txHash)
// Fetch the created account const newAccount = await pg.program.account.newAccount.fetch(newAccountKp.publicKey)
console.log('On-chain data is:', newAccount.data.toString())
// Check whether the data on-chain is equal to local 'data' assert(data.eq(newAccount.data)) })})Run the tests with test:
testRunning tests... anchor.test.ts: Test Use 'solana confirm -v h6JV2E4HKiFMHLVQaFDRma9h8K3RBHKTb7vMiT8cLBsVQoyBnZmF6wD5cSrEG1ai6Bu7x7ibJakAyqXE45BJti' to see the logs On-chain data is: 42 ✓ initialize (2139ms) 1 passing (2s)You can also click the Test button on the left-side panel.

To view the transaction logs, run solana confirm -v with the transaction hash from the test output:
solana confirm -v h6JV2E4HKiFMHLVQaFDRma9h8K3RBHKTb7vMiT8cLBsVQoyBnZmF6wD5cSrEG1ai6Bu7x7ibJakAyqXE45BJtiRPC URL: https://api.devnet.solana.comDefault Signer: Playground WalletCommitment: confirmed
Transaction executed in slot 457828860: Block Time: 2026-04-24T13:51:45-07:0030 collapsed lines
Version: legacy Recent Blockhash: FEfP1gMjVdNrLiHoxc67C2cXBsGF3cy9s8QPmEhjb7Q4 Signature 0: h6JV2E4HKiFMHLVQaFDRma9h8K3RBHKTb7vMiT8cLBsVQoyBnZmF6wD5cSrEG1ai6Bu7x7ibJakAyqEXE45BJti Signature 1: 5TWWTnvJaiaooPR7zgACSUjxuZ6kz8eDnBjCd1AyVBMSWa9mvm3HedsN54Tu9iLJasbN4GpFcfSXqgrCri2cqRRc Account 0: srw- DY6arEvmJEfVXERsZ6LusRpjz5y5bqwQJRVcyE1zChBB (fee payer) Account 1: srw- 2vWvBBYP5PLczTuTm7nN7mhUEM45kxex9ASjXqrEh9Dh Account 2: -r-- 11111111111111111111111111111111 Account 3: -r-x 3uCJdLdxY9fThNZ9U3oaBmhzxnEvZaRUiRYTJHZVxM4f Instruction 0 Program: 3uCJdLdxY9fThNZ9U3oaBmhzxnEvZaRUiRYTJHZVxM4f (3) Account 0: 2vWvBBYP5PLczTuTm7nN7mhUEM45kxex9ASjXqrEh9Dh (1) Account 1: DY6arEvmJEfVXERsZ6LusRpjz5y5bqwQJRVcyE1zChBB (0) Account 2: 11111111111111111111111111111111 (2) Data: [175, 175, 109, 31, 13, 152, 155, 237, 42, 0, 0, 0, 0, 0, 0, 0] Status: Ok Fee: ◎0.00001 Account 0 balance: ◎2.09821932 -> ◎2.09720708 Account 1 balance: ◎0 -> ◎0.00100224 Account 2 balance: ◎0.000000001 Account 3 balance: ◎0.00139896 Log Messages: Program 3uCJdLdxY9fThNZ9U3oaBmhzxnEvZaRUiRYTJHZVxM4f invoke [1] Program log: Instruction: Initialize Program 11111111111111111111111111111111 invoke [2] Program 11111111111111111111111111111111 success Program log: Changed data to: 42! Program 3uCJdLdxY9fThNZ9U3oaBmhzxnEvZaRUiRYTJHZVxM4f consumed 6266 of 200000 compute units Program 3uCJdLdxY9fThNZ9U3oaBmhzxnEvZaRUiRYTJHZVxM4f success
FinalizedClose program#
You can close the program to reclaim the SOL allocated to it. To close a program, run:
solana program close <program-id>Closed Program Id <program-id>, 2.89823448 SOL reclaimedLocal development
Learn how to build Solana programs using the Anchor framework on your local machine.
The Anchor framework streamlines the process of writing, testing, and deploying Solana programs. This guide walks through creating a new project, iterating on it locally, and deploying it to a public cluster.
Prerequisites#
Before you begin, ensure you have Rust, the Solana CLI, and the Anchor CLI installed. See the Installation page for step-by-step instructions.
Getting started#
Create a new project#
To start a new project, use the anchor init <project-name> (for our examples, we will use my-project for <project-name>). This creates a new directory with the specified name and scaffolds a default program and test file. By default, Anchor generates a modular program structure to promote better code organization and maintainability:
programs/
my-project/
src/
instructions/Instruction handler implementations
- initialize.rs
- constants.rs Program constants
- error.rs Custom error definitions
- instructions.rs Instructions module root
- lib.rs Main entry point
- state.rs Account state module root
lib.rs is the program’s entry point. It declares each submodule and wires instruction handlers into the #[program] block. The declare_id!() value is your program’s on-chain address (by default, the public key of the keypair at /target/deploy/my_project-keypair.json).
pub mod constants;pub mod error;pub mod instructions;pub mod state;
use anchor_lang::prelude::\*;
pub use constants::_; pub use instructions::_; pub use state::\*;
declare_id!("3ynNB373Q3VAzKp7m4x238po36hjAGFXFJB4ybN2iTyg");
#[program] pub mod my_project { use super::\*;
pub fn initialize(ctx: Context<Initialize>) -> Result<()> { initialize::handler(ctx) }
}use anchor_lang::prelude::*;
#[derive(Accounts)]pub struct Initialize {}
pub fn handler(ctx: Context<Initialize>) -> Result<()> { msg!("Greetings from: {:?}", ctx.program_id); Ok(())}Tip (Single-file template)
For quick prototypes, skip the module split with anchor init --template single. The
modular layout is recommended for anything you plan to maintain.
Test file#
Anchor generates a test file alongside the program. TypeScript is the default. To get a Rust test instead, pass --test-template rust (Rust client) or --test-template mollusk (Mollusk).
Located at /tests/my-project.ts. Invokes the initialize() instruction via the generated client:
import * as anchor from '@anchor-lang/core'import { Program } from '@anchor-lang/core'import { MyProject } from '../target/types/my_project'
describe('my-project', () => { anchor.setProvider(anchor.AnchorProvider.env()) const program = anchor.workspace.MyProject as Program<MyProject>
it('Is initialized!', async () => { const tx = await program.methods.initialize().rpc() console.log('Your transaction signature', tx) })})Located at /tests/src/test_initialize.rs. Uses anchor_client to call the program against localnet:
use std::str::FromStr;
use anchor_client::{ solana_sdk::{ commitment_config::CommitmentConfig, pubkey::Pubkey, signature::read_keypair_file, }, Client, Cluster,};
#[test]fn test_initialize() { let program_id = "3ynNB373Q3VAzKp7m4x238po36hjAGFXFJB4ybN2iTyg"; let anchor_wallet = std::env::var("ANCHOR_WALLET").unwrap(); let payer = read_keypair_file(&anchor_wallet).unwrap();
let client = Client::new_with_options(Cluster::Localnet, &payer, CommitmentConfig::confirmed()); let program_id = Pubkey::from_str(program_id).unwrap(); let program = client.program(program_id).unwrap();
let tx = program .request() .accounts(my_program::accounts::Initialize {}) .args(my_program::instruction::Initialize {}) .send() .expect("");
println!("Your transaction signature {}", tx);}Build the program#
Run anchor build to compile the program. The compiled artifact is written to /target/deploy/my_project.so. This binary is the executable bytecode uploaded to the chain during deployment.
Test the program#
Run anchor test to execute the test suite against a local cluster.
With the default Anchor.toml targeting localnet, this starts a local validator, builds and deploys the program, runs the tests in /tests, then shuts the validator down.
Tip (Persistent validator for debugging)
To keep the validator running between iterations so you can inspect accounts and transaction logs
on the Solana Explorer while developing, start ${' '} solana-test-validator in a separate terminal. From there, pass --skip-local-validator to anchor test{' '} --skip-local-validator so tests attach to the running instance instead of spawning
their own.
Deploy to Devnet#
By default, the Anchor.toml config file in an Anchor project specifies the localnet cluster. To deploy your program to devnet, change the cluster value to "Devnet":
[toolchain]
[features]resolution = trueskip-lint = false
[programs.localnet]my_program = "3ynNB373Q3VAzKp7m4x238po36hjAGFXFJB4ybN2iTyg"
[provider]cluster = "Localnet"cluster = "Devnet"wallet = "~/.config/solana/id.json"
[scripts]test = "yarn run ts-mocha -p ./tsconfig.json -t 1000000 tests/**/*.ts"Important (Funding the deploy wallet)
Deploying to devnet requires your wallet to have enough SOL to cover the deployment cost. You can get devnet SOL using the Web Faucet.
Run anchor deploy to push the program to the cluster specified in Anchor.toml. The anchor test command also respects this setting.
To deploy to mainnet, update the Anchor.toml file to specify the mainnet cluster:
[provider]cluster = "Devnet"cluster = "Mainnet"wallet = "~/.config/solana/id.json"Update the program#
Solana programs are updated in place by redeploying a new build to the same program ID. After making code changes, run anchor build to produce an updated .so artifact, then anchor deploy to upload it.
Close the program#
Closing a program reclaims the SOL allocated to its on-chain account. Run solana program close <program-id> to retire it:
solana program close <program-id> --bypass-warningThe program ID is permanently retired once closed. You cannot redeploy to the same address.
Project file structure#
A default Anchor workspace contains the following top-level files and directories. A single workspace may host multiple programs under programs/, though anchor init generates one by default.
.anchor/
- program-logs Transaction logs from the last test run
- app/Frontend code (empty by default)
- migrations/Deployment scripts (optional)
programs/Anchor programs
[project-name]/
src/
instructions/
- initialize.rs
- constants.rs
- error.rs
- instructions.rs Instructions module root
- lib.rs Program entry point and #[program] module
- state.rs Account state module root
- Cargo.toml
target/Build outputs
- deploy/Program binary (.so) and keypair
- idl/JSON IDL generated from the program
- types/TypeScript types derived from the IDL
tests/Integration tests (TypeScript by default)
- [project-name].ts
- Anchor.toml Workspace config (clusters, wallet, scripts)
- Cargo.toml Rust workspace manifest
- package.json Node dependencies for TypeScript tests